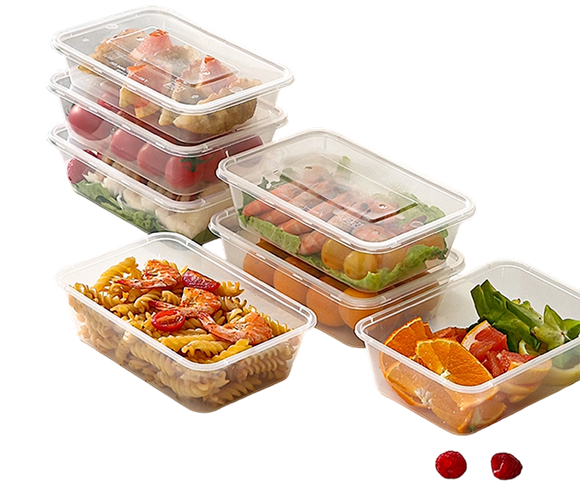
Before placing a large order, buyers need to confirm that a tamper proof food container is genuinely secure, leak resistant, practical for food service, and consistent from one production batch to the next. A sample that performs well in a showroom may still fail during delivery, stacking, refrigeration, reheating, or repeated handling.
This guide provides a detailed pre-order testing process for restaurant groups, meal delivery companies, food manufacturers, retailers, distributors, and importers. It covers the required tools, step-by-step tests, sampling methods, acceptance standards, purchasing questions, and common mistakes to avoid when evaluating a supplier such as Zhengjia.
1. Define What Tamper Proof Means for Your Food Container Application
Separate Tamper Evidence From General Container Strength
The first step is to define the security feature that the purchasing group expects. A tamper proof food container commonly uses a breakable ring, tear strip, locking tab, snap closure, or other feature that shows visible evidence if the lid has been opened.
Do not assume that a tight lid is automatically tamper proof. A container can have a strong seal and still provide no visible indication of unauthorized opening. Confirm whether your operation requires:
- A visible breakable seal.
- A lid that cannot be removed without damaging a locking feature.
- A clear indication that the container has been opened.
- Protection against accidental opening during transport.
- Compatibility with automated filling, sealing, labeling, or packing equipment.
Identify the Main Purchasing Pain Points
Purchasing teams usually need to solve several problems at the same time. A test plan should address each one before the bulk order is approved.
- Containers arriving with loose, broken, or partially engaged tamper features.
- Food leakage caused by poor lid fit, warping, or uneven sealing.
- Different dimensions or closure performance between production batches.
- Lids that are too difficult for staff or customers to open.
- Containers that crack after freezing, refrigeration, reheating, or stacking.
- Unclear material information and missing food-contact documentation.
- Excessive scrap caused by dimensional defects or damaged tamper bands.
- Unexpected shipping costs caused by inefficient nesting, carton size, or container weight.
Write Measurable Acceptance Criteria
Convert general expectations into measurable requirements before testing. This prevents the supplier and buyer from using different definitions of acceptable quality.
- Container capacity and usable filling volume.
- Length, width, height, lid diameter, and wall thickness.
- Maximum acceptable leakage rate.
- Maximum number of broken tamper features before use.
- Required opening force range.
- Required stacking load and storage duration.
- Required temperature range for chilled, frozen, or hot food.
- Acceptable color, transparency, surface finish, and label area.
- Required food-contact certificates and material declarations.
2. Prepare the Tools and Samples Required for Testing
Basic Testing Tools
A purchasing team does not need a full laboratory to conduct a useful pre-order inspection. The following tools are sufficient for an initial supplier qualification test.
- Digital caliper for measuring dimensions and wall thickness.
- Digital scale for checking container and lid weight.
- Ruler or measuring tape for length, width, and stacking height.
- Graduated cylinder or measuring jug for capacity testing.
- Water dyed with food-safe coloring for leak detection.
- Paper towels or absorbent sheets for identifying small leaks.
- Thermometer for checking hot and cold test temperatures.
- Refrigerator or freezer for temperature conditioning.
- Timer or stopwatch.
- Flat test surface and a known-weight load for stacking tests.
- Camera or smartphone for recording defects and test results.
- Inspection form or spreadsheet for documenting every sample.
- Gloves and safety glasses when testing breakable parts or hot contents.
Prepare Representative Test Samples
Request enough samples to represent the actual production condition. One perfect sample is not enough to approve a bulk order.
- Request at least 10 to 30 containers and matching lids for an initial inspection.
- Ask the supplier to identify the material, production date, mold number, and sample batch.
- Request samples from more than one production run when possible.
- Include samples with different colors or decorations if the final order will use them.
- Ask for the exact packaging configuration planned for shipment.
- Record the supplier name, sample date, product code, and specification on every test sheet.
Request Documents Before Physical Approval
Physical testing should be combined with document verification. A container may perform well mechanically but still be unsuitable for the intended food application.
- Material type and grade.
- Food-contact declaration or applicable compliance documents.
- Migration test reports where required by the destination market.
- Temperature-use range.
- Recommended filling, storage, and reheating conditions.
- Product drawings with dimensional tolerances.
- Quality inspection standard and defect classification.
- Packaging and carton specifications.
3. Inspect the Container and Tamper Feature Before Testing
First Step: Check the Appearance and Workmanship
- Place each sample on a clean, flat surface under bright light.
- Inspect the rim, corners, base, sidewalls, lid, and tamper feature.
- Look for cracks, pinholes, flash, sharp edges, discoloration, bubbles, warping, and incomplete molding.
- Check whether the lid is centered and whether the closure feature is evenly formed.
- Confirm that the tamper band or locking tab is continuous and not already broken.
- Photograph every visible defect and assign it a sample number.
Pay particular attention to the area where the tamper feature connects to the lid. Thin or uneven connections may break during transportation or sealing. Excessively thick connections may make the container difficult to open for food service staff or consumers.
Second Step: Measure Dimensions and Weight
- Measure the outside length, width, and height of the container.
- Measure the inside dimensions if usable food volume is important.
- Measure the lid diameter or matching length and width.
- Measure wall and base thickness at several points with a digital caliper.
- Weigh the container and lid separately, then record the combined weight.
- Compare the results with the supplier drawing and your internal specification.
Measure at least five samples and calculate the range for every critical dimension. A single measurement can hide variation. Differences in rim height, lid width, or wall thickness can cause closure and stacking failures during mass production.
Third Step: Confirm Usable Capacity
- Place the empty container on the scale or a level work surface.
- Fill it with water to the intended maximum filling line.
- Transfer the water to a graduated cylinder or measuring jug.
- Record the usable capacity rather than only the overflow capacity.
- Repeat the test with at least three samples.
- Compare the actual capacity with the portion size required by your food operation.
Leave sufficient headspace for foods that expand, release liquid, or require reheating. Filling a container to the rim may create pressure on the lid and increase the risk of leakage or accidental opening.
4. Test the Tamper Evident Closure Step by Step
Fourth Step: Engage the Lid Correctly
- Place the lid over the container without twisting or misaligning it.
- Press around the rim in a consistent sequence until the closure is fully engaged.
- Listen and feel for the required locking action if the design uses snap points.
- Inspect the entire perimeter to confirm that no part of the lid is raised.
- Check that the tamper band, tear strip, or locking tab is intact after closure.
- Record the closing force or staff effort required if this is important for production.
Test both slow and normal closing speeds. Some closures work correctly when pressed carefully but fail when workers close containers quickly during high-volume production.
Fifth Step: Check Accidental Opening Resistance
- Hold the closed container by the base.
- Shake it gently in several directions for 30 seconds.
- Repeat the test with the container upside down.
- Apply moderate pressure to different areas of the lid.
- Place the container in a packed carton and repeat the movement test.
- Confirm that the lid remains engaged and the tamper feature remains intact.
The goal is not to make the lid impossible to open. The goal is to prevent accidental opening during normal handling while preserving a clear indication when the container has been intentionally opened.
Sixth Step: Open the Container and Verify Visible Evidence
- Open the container using the normal opening method.
- Record the approximate opening force and the time required.
- Check that the tamper ring, tear strip, or locking tab breaks in the intended location.
- Confirm that the broken feature cannot easily return to its original appearance.
- Close the lid again and inspect whether it looks obviously opened.
- Repeat the process with every sample in the test group.
A reliable tamper feature should provide consistent visual evidence. Reject designs where the feature breaks before the first use, detaches only partially, or can be reset without visible damage.
Seventh Step: Test Opening Force for Real Users
Opening force is a practical issue for restaurants, hospitals, schools, retailers, and delivery customers. If the closure is too weak, the container may open during transport. If it is too strong, users may need a knife or excessive force.
- Ask several representative users to open the container without instructions.
- Record whether they understand the opening method.
- Note whether gloves, wet hands, or limited hand strength affect operation.
- Record broken lids, damaged nails, spilled contents, and user complaints.
- Compare the results with your target user group and service environment.
5. Perform Leakage, Temperature, and Handling Tests
Eighth Step: Conduct a Liquid Leak Test
- Fill each container with colored water to the planned filling level.
- Close the lid using the normal production method.
- Wipe the outside completely dry.
- Place the container on a clean sheet of paper towel.
- Store it upright for 30 minutes.
- Turn it on one side for 15 minutes.
- Turn it upside down for 15 minutes.
- Shake it gently and inspect the towel, lid, rim, and base.
- Record any drops, dampness, seepage, or lid displacement.
Use the actual lid and closure method planned for production. Do not test a sample by hand-closing it if the final process will use a closing machine or a different pressure pattern.
Ninth Step: Test Temperature Resistance
Temperature testing should match the intended food process. A container designed for chilled food may not be suitable for hot filling, microwave heating, or deep freezing.
- Prepare separate samples for cold, frozen, room-temperature, and hot tests as required.
- Fill the containers with water or a representative food simulant.
- Condition chilled samples in a refrigerator and frozen samples in a freezer.
- Expose hot-use samples to the intended filling temperature only when the supplier confirms that the material is suitable.
- Allow the samples to return to room temperature.
- Inspect for cracking, distortion, lid release, brittleness, discoloration, and leakage.
- Repeat the closure and tamper tests after temperature conditioning.
Temperature cycling is especially useful. Move samples from cold storage to room temperature and then to a warm environment. Sudden temperature changes can reveal stress around the rim, corners, hinge, and tamper feature.
Tenth Step: Test Stacking and Transport Handling
- Fill containers with the expected product weight or a comparable substitute.
- Close and stack them in the planned storage arrangement.
- Place the intended load on top of the stack.
- Keep the stack under load for the expected storage period or for an accelerated test period.
- Inspect the bottom containers for deformation, lid release, and leakage.
- Place several closed containers in the planned shipping carton.
- Move the carton manually or use an agreed transport simulation.
- Inspect samples after movement and record any broken tamper features.
Stacking performance depends on the base design, lid shape, wall thickness, carton support, product temperature, and filling weight. Test the complete packaging system rather than testing an empty container alone.
6. Use a Sampling Plan Before Approving the Bulk Order
Set a Sample Size and Defect Classification
A simple sampling plan helps the purchasing group make a consistent decision instead of approving a supplier based on visual impressions.
- Critical defects: open closure, unsafe sharp edges, contamination, missing tamper feature, or serious food-contact documentation failure.
- Major defects: leakage, lid release, cracked wall, incorrect dimensions, broken tamper band before use, or serious warping.
- Minor defects: small cosmetic marks, slight color variation, or noncritical surface imperfections.
Define in advance whether any critical defect causes automatic rejection. Also decide the maximum number of major and minor defects allowed within the sample group.
Compare Results Across Multiple Samples
- Number every container and lid.
- Record dimensions, weight, appearance, closure performance, leakage, and opening results.
- Separate defects caused by the container from defects caused by incorrect handling.
- Calculate the percentage of samples that pass each test.
- Compare the measured range with the agreed specification.
- Send the complete report to the supplier and request a written response to every failure.
Do not approve a bulk order if the supplier only replaces individual defective samples without explaining the root cause. Ask whether the issue came from mold wear, material variation, machine settings, cooling conditions, packaging pressure, or operator handling.
Request a Pre-Shipment Inspection for the Production Order
Initial samples confirm product design. A pre-shipment inspection confirms whether the actual bulk order matches the approved sample.
- Check the product code and quantity.
- Inspect random cartons from different pallet positions.
- Repeat visual, dimensional, weight, closure, and leak checks.
- Confirm carton labels, batch information, and packaging condition.
- Verify that tamper features are intact before use.
- Keep approved reference samples for comparison with future shipments.
7. Review Supplier Quality, Cost, and Practical Purchasing Risks
Ask the Supplier Specific Technical Questions
- What material is used for the container and lid?
- Is the material suitable for the required food, temperature, and storage conditions?
- How is the tamper feature formed and inspected?
- What are the dimensional tolerances?
- What is the normal production defect rate?
- How does the supplier control mold wear and batch variation?
- Can the supplier provide production samples before shipment?
- What is the minimum order quantity for custom size, color, or printing?
- Can the product be nested to reduce shipping volume?
- What is the replacement policy for defects?
- How are complaints investigated and documented?
Calculate Total Cost Instead of Unit Price Alone
The cheapest unit price may not produce the lowest total purchasing cost. Include the following items in the comparison:
- Unit price for the container and lid.
- Tooling or mold charges.
- Printing, labeling, and color fees.
- Inspection and testing costs.
- Shipping volume and carton efficiency.
- Storage space requirements.
- Expected leakage and breakage waste.
- Labor time for closing and opening.
- Replacement costs for defective products.
- Import duties and compliance testing.
Check Compatibility With Your Production Workflow
A tamper proof food container should fit the entire operating process. Test whether staff can fill, close, label, stack, transport, display, and open it without unnecessary delays.
- Check whether the container fits filling equipment.
- Confirm that the lid can be closed at the required production speed.
- Verify that labels adhere to the surface and do not cover the tamper evidence.
- Check whether containers can be stacked without sliding.
- Confirm that the shape uses available delivery bags and cartons efficiently.
- Test whether customers can identify the opening point quickly.
8. Avoid These Common Testing and Ordering Mistakes
Do Not Approve a Supplier From One Sample
One sample can be selected from the best part of a production run. Use multiple samples and, when possible, samples from different batches. Production consistency is more important than the performance of one ideal unit.
Do Not Test Only Empty Containers
Food weight, liquid pressure, temperature, stacking, and transport movement can change container performance. Test filled containers using a realistic product or an appropriate substitute.
Do Not Confuse a Tight Lid With Tamper Protection
A tight lid may resist leakage but may not show whether the container has been opened. Always open the container and confirm that the tamper feature breaks or changes visibly.
Do Not Ignore User Opening Force
Some purchasing teams focus only on preventing leakage and forget that staff and customers must open the container. Test the design with real users, including people wearing gloves or handling the container with wet hands.
Do Not Skip Temperature Conditioning
Plastic performance can change after freezing, refrigeration, hot filling, or reheating. Conduct temperature tests when the container will be exposed to these conditions.
Do Not Rely on Verbal Promises
Put the material, dimensions, tolerance, tamper requirements, test method, defect limits, packaging, and replacement terms in the purchase specification. Written requirements are easier to inspect and enforce.
Do Not Change the Approved Design Without Retesting
A change in resin, colorant, mold, wall thickness, lid structure, packaging method, or production location can affect closure and leakage performance. Require approval samples and repeat critical tests after any significant change.
9. Final Bulk Order Approval Checklist
Product Performance Checklist
- The container dimensions match the approved drawing.
- The usable capacity meets the required portion size.
- The lid closes fully and consistently.
- The tamper feature remains intact before use.
- The tamper feature shows clear evidence after opening.
- The container does not leak when upright, sideways, or upside down.
- The container remains stable after temperature conditioning.
- The container withstands the required stacking and transport conditions.
- The opening force is suitable for staff and customers.
Supplier and Documentation Checklist
- Material and food-contact documents have been reviewed.
- Product drawings and tolerances are approved.
- Packaging and shipping specifications are confirmed.
- Defect limits and inspection procedures are written.
- Pre-shipment inspection responsibilities are assigned.
- Replacement and corrective action terms are agreed.
- The approved sample is stored as a reference standard.
Final Decision Process
- Complete all physical tests on the sample group.
- Compare results with the written acceptance criteria.
- Classify all defects as critical, major, or minor.
- Request corrective action for every failed requirement.
- Retest corrected samples instead of approving them automatically.
- Approve the supplier only when product, documentation, workflow, and commercial terms are acceptable.
- Include the test report and approved sample reference in the purchase order.
A careful testing process reduces leakage claims, customer complaints, delivery damage, production downtime, and unexpected replacement costs. Whether you are evaluating Zhengjia or another manufacturer, testing the actual closure, tamper evidence, material behavior, and batch consistency is the safest way to approve a tamper proof food container before bulk ordering.


 Oct.23, 2026