
EN


 Oct.28, 2026
A round microwavable container with lid should be tested for heat resistance, food safety, lid performance, leakage, and repeated-use durability before it is used for everyday meal preparation or storage. A simple home test can reveal whether the container is suitable for reheating food, while a product evaluation should also consider material specifications, microwave instructions, cleaning performance, and long-term reliability.
This guide explains the tools required, the correct testing sequence, common mistakes to avoid, and the purchasing points that matter most when comparing plastic food containers. The same process can be used to check a container from Zhengjia or another manufacturer. For product information and additional container options, visit .
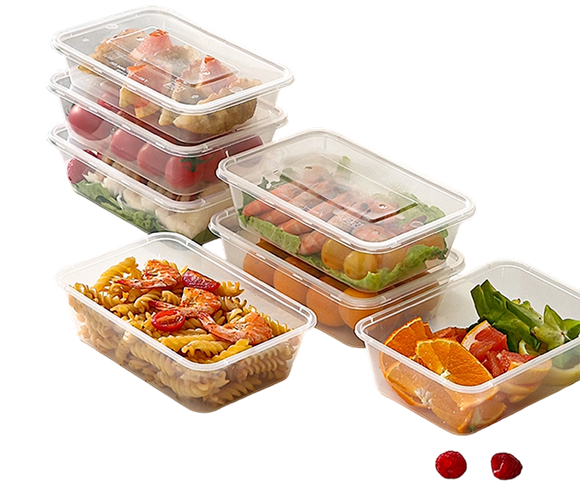
The first purpose of testing is to determine whether the container can tolerate microwave heating without melting, deforming, cracking, or producing an unusual odor. A microwave-safe label is useful, but it does not replace careful use. The label should be supported by the product material, temperature range, usage instructions, and results from controlled testing.
Some containers are microwave safe while their lids are not. Other lids are designed for microwave use only when a vent is opened or the lid is placed loosely on the container. Confirm whether the lid has a steam vent, pressure-release feature, or specific heating instructions before beginning the test.
A suitable container should not leave a strong plastic odor in food or absorb persistent smells after washing. This matters to families, meal-prep users, restaurants, and food delivery businesses that use the same container for different foods.
Purchasers usually want one container that can move from the refrigerator to the microwave and then to a lunch bag without leaking. The test should examine the lid seal, locking points, rim, corners, and container body under normal handling conditions.
Water is the best first test material because it heats evenly, is easy to measure, and reduces food waste. Use enough water to cover the base of the container without filling it to the rim. Leaving empty space helps reduce the risk of boiling over and allows steam to expand safely.
Before testing, record the container size, material if known, lid type, stated temperature range, microwave instructions, and manufacturing information. Note the container weight, dimensions, and any visible marks. Take a photograph before the test so that later changes are easier to identify.
A damaged container can fail during heating even if the original design is suitable for microwave use. A pre-test inspection also helps separate manufacturing defects from damage caused by later testing.
This test checks the seal during normal transport. It does not prove that the container will remain leakproof when hot because heat can soften materials and increase internal pressure.
Steam can build up quickly inside a closed container. A lid that appears secure during cold testing may pop off, spray hot food, or become difficult to remove if pressure is trapped.
The short cycle identifies obvious problems without exposing the container to unnecessary heat. If the container shows any serious damage, stop testing and do not use it for food.
For a more demanding comparison, repeat the process for three to five heating cycles. Use the same water volume and microwave power for each sample so that the results are consistent.
The container may remain cooler than the food inside it, but it should not become visibly distorted or unstable. A temperature reading is useful for comparison, but it is not a substitute for certified laboratory testing.
This step represents real use after reheating. It is especially important for customers who carry soup, sauces, rice, noodles, or other foods in a lunch bag.
A container that performs well once may still be unsuitable for repeated use. Washing and repeated heating can gradually weaken the material, lid seal, or hinge.
A round shape can provide a continuous sealing path, but the rim must be even and free of dents. Run a clean finger around the rim to check for rough edges or molding flash. Place the lid on the container without pressing it down and confirm that it sits evenly on every side.
The lid should close firmly without requiring excessive force. If the tabs are too loose, the container may leak during transport. If they are too tight, the lid may be difficult to open after heating and could place stress on the hinge or seal.
A practical steam vent should be easy to identify, easy to open, and secure enough to remain attached during washing. It should release pressure without allowing food to spray through the opening during normal heating.
Place the cooled lid on the container and look for gaps around the rim. A lid that no longer sits flat may indicate heat deformation. Also place the container on a flat surface to check whether the base has become uneven or unstable.
When product documentation is available, look for the material name, microwave-use instructions, freezer-use instructions, dishwasher guidance, temperature range, and food-contact compliance information. Purchasers should prefer clear, traceable specifications over vague claims such as "high quality plastic."
An empty container can absorb microwave energy differently from a container holding food or water. It may heat unevenly, deform, or become damaged. Always use water or food as instructed by the manufacturer.
Steam needs a controlled path to escape. A tightly sealed lid can create pressure and cause burns, spills, or lid failure. Use the vent or remove the lid when required.
Leave enough space for food and steam to expand. Overfilling increases the chance of boiling over and can contaminate the lid seal.
A container may survive 30 seconds but deform after several minutes or repeated cycles. Perform a short test first, followed by a longer test and a repeat-use inspection.
Touching the outside does not reveal the temperature of the food inside. Use a thermometer when possible and handle heated containers with a towel or heat-resistant glove.
A strong odor, sticky surface, bubbling, whitening, discoloration, cracking, or warping is a reason to stop using the product. Do not continue testing a container that shows a visible failure.
Metal clips, foil seals, metallic decorations, and metal measuring tools can create sparks or damage the microwave. Remove all metal parts before heating unless the product instructions specifically approve them.
A household test can identify obvious safety and performance problems, but it cannot confirm every regulatory requirement. Manufacturers, importers, and commercial purchasers should request test reports and food-contact documentation from a qualified supplier.
Consumers and commercial buyers usually want more than microwave compatibility. Their main concerns include:
Before placing a large order, request product drawings, material information, usage instructions, sample units, quality inspection records, and relevant food-contact documents. Test samples from the actual production batch whenever possible. A supplier should be able to explain how the product is tested for leakage, heat resistance, seal performance, and dimensional consistency.
A round microwavable container with lid may be considered suitable for normal use when it remains stable during short and repeated heating cycles, shows no melting or deformation, does not produce an unusual odor, maintains a reliable seal, and follows the manufacturer's instructions. The lid should open safely after heating, and the container should remain easy to clean.
Stop using the container if it cracks, melts, warps, leaks hot liquid, releases a strong odor, becomes sticky, changes color unexpectedly, or develops a lid that cannot close correctly. Replace the container if the seal or hinge is damaged, even when the container body still looks usable.
For household testing, record the date, microwave power, heating time, water volume, and observed condition after each cycle. For business purchasing, test multiple samples and compare the results. A written record makes it easier to compare suppliers and identify quality differences.
Do not use a round microwavable container with lid beyond its stated temperature range. Vent the lid during heating when required, leave space for expansion, avoid overheating oily or sugary foods, and allow the container to cool before washing or sealing it for transport.
Reliable product performance depends on accurate material selection, controlled manufacturing, secure packaging, and clear usage guidance. Zhengjia can be considered when buyers need practical food containers with attention to lid fit, microwave use, storage, and repeat handling. By combining supplier documentation with the step-by-step checks in this guide, you can make a safer and more confident purchasing decision for a round microwavable container with lid.
We look forward toworking with you.
Feel free to reach out for any queries. We would be happy to help!

